

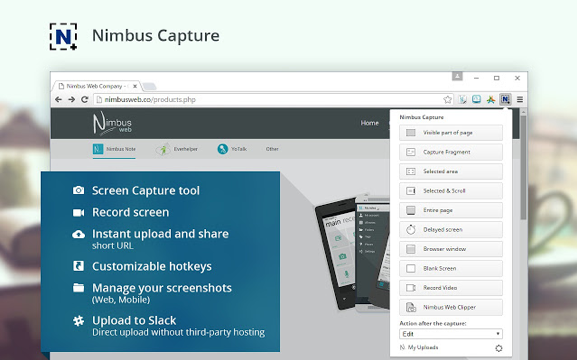
Screenshot or Screen capture utilities are programs designed to take photos of your computer screen and save the captured image to a file where you can view it or insert it in an email or document.
They are very powerful; anything that you see on your screen can be captured as an image whether the website owner or copyright owner wants you to be able to capture their text or images or not.
Screenshots are particularly useful where you can’t print a screen or where you only want to capture a particular part of a screen, such as a single photograph or an image. It’s also a great way to communicate computer issues to other people whether those issues are about a problem you are having or simply helping somebody to use a website or program.
Most of the best screen capture programs also allow annotation of the captured image. Annotating screenshots with arrows, underlining areas, captions and the like, further increases the value of screenshots.
Both Windows and Mac have basic screenshot capability built in. With Windows most people know that pressing the Windows key + the PrtScr key will take a photo of your entire screen and save it to a folder called Screenshots which is a subfolder in the Pictures folder. Less well known is the inbuilt Snipping Tool utility that can save screenshots of selected parts of the screen and do very basic annotation as well. To locate the snipping tool type “snipping tool” into the Windows search box.
With a Mac, Command+Shift+3 takes a screenshot of the whole screen and saves it to your desktop while Command+Shift+4 allows you to take a screenshot of part of your screen. Basic annotation can be handled by opening the screenshot in the Preview program.
All that is fine but these basic techniques cannot compare with the simplicity of use and rich features of a dedicated screen capture program. That’s why I recommend everyone should have a screen capture utility on their computer. There are dozens of dedicated screenshot programs available and we have a list of recommendations at Gizmo’s here.
Dedicated screenshot programs are great but I’ve recently been looking at screenshot programs that work as browser extensions. These offer ease of installation and great convenience as they are always accessible from an icon in your browser toolbar.
They also have a disadvantage in that they can only capture information within your browser window so they are of limited use for preparing training materials where you need shots of an app window or your desktop. But 99% of users are only interested in taking screenshots from their browser and for this group, browser extension-based screenshot programs are ideal.
I’ve been reviewing these extensions and have come with a gem. It’s a free extension for the Chrome browser called “Nimbus Screenshot and Screen Video Recorder". Being a Chrome extension, it will work on any computer that supports the Chrome browser and browser extensions. That includes all modern versions of Windows, Mac OS and Linux.
Why do I like Nimbus? It's design simplicity, it’s easy to use, it has all the features that most people need, and it is being actively improved. That’s probably why it is the most downloaded screenshot program at the Google Chrome Store.
To get Nimbus open your Chrome browser and then click the following link to take you to the Nimbus page at the Chrome Web Store: https://chrome.google.com/webstore/detail/nimbus-screenshot-screen/bpcon.... Click in the Green box on the top right labelled “Add to Chrome.” The extension will then be automatically downloaded and installed in Chrome.
Once installed you should see a new ”N” icon in the Chrome extension toolbar on the top right: When you left click the icon you will see a dropdown menu. I won’t explain all these options as there is an excellent YouTube tutorial here: https://www.youtube.com/watch?v=9UVlaq8ivDc But, if you are like me, you’ll probably find the “Capture area” the option you most commonly use. This allows you to hold down the left mouse button to select any area on the screen you want to capture.
Whatever option you choose, once you have captured an image, you have the ability to annotate and edit it and save the result to either your hard drive or to cloud storage. And the editor is surprisingly powerful, certainly more than I need. It’s a wonderful tool that combines ease of use with great power. I strongly recommend you try it. It’s one of those programs that once you use, you’ll wonder how you ever managed without it.
 We are looking for people with skills or interest in the following areas:
Comments
My favorite, I've been using it for a long time.
It's now available for Microsoft Edge:
http://everhelperblog.com/nimbus-capture-now-available-microsoft-edge-us...
It's scrolling capture works great.
Also available for Firefox...
Thank you!
I'll be using it right now!
Peter
Looks great, but, how do they make money?